
Introduction
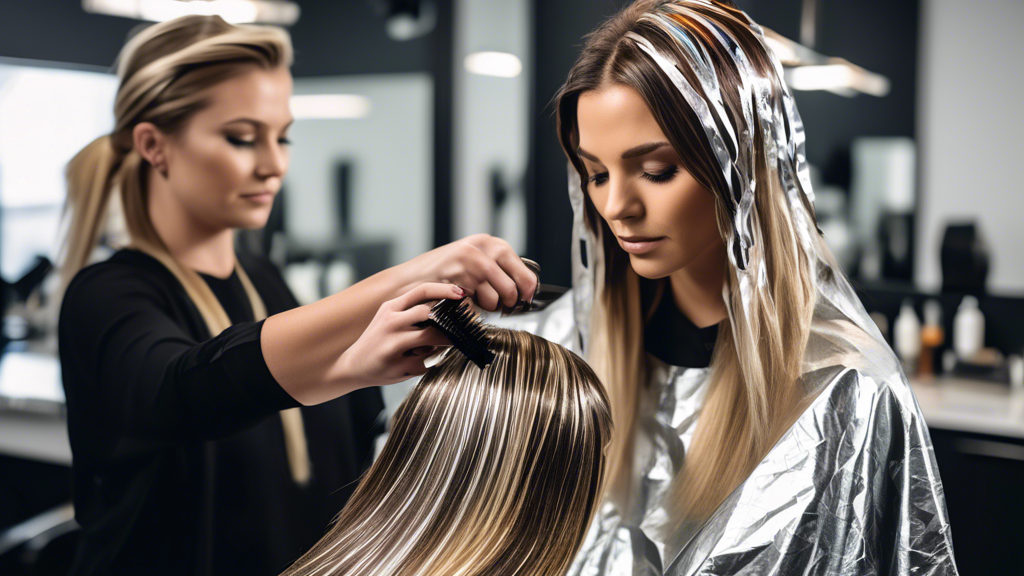
Are you seeking a way to achieve salon-quality hair color at home? Consider the versatile and effective method of using aluminum foil for dying hair. This technique is favored by both professionals and DIY enthusiasts for its precision, efficiency, and protection against color bleed. Whether you're aiming for subtle highlights or a dramatic transformation, aluminum foil can help you achieve the perfect look. In this guide, we'll explore the benefits of using aluminum foil when dying hair, provide a step-by-step approach to master this technique, and share expert tips to ensure your results are nothing short of spectacular.
Aluminum foil has long been a trusted tool in the hairstyling world, and for good reason. It offers enhanced precision and control, allowing for even application and separation of different sections of hair. Additionally, the thermal properties of aluminum foil can speed up the dyeing process, making it more efficient compared to other methods. If you're concerned about overlapping colors or ensuring distinct color patterns, aluminum foil is your go-to solution. By the end of this article, you'll be equipped with the knowledge to transform your hair color with professional finesse using aluminum foil.
The Benefits of Using Aluminum Foil for Dying Hair
Learn why aluminum foil is a game-changer for at-home hair dyeing. Discover its advantages in precision, processing time, and maintaining clean color lines, and why it's a staple in professional salons.
The Benefits of Using Aluminum Foil for Dying Hair
Enhanced Precision and Control
One of the standout benefits of using aluminum foil for dying hair is the enhanced precision and control it offers. Aluminum foil serves as a versatile tool in the hair dyeing process, particularly when it comes to achieving precise highlights and lowlights. This is because aluminum foil can be wrapped around small sections of hair, allowing for targeted application of color. Unlike traditional dyeing methods where dye might spread unintentionally, aluminum foil enables you to isolate specific strands, ensuring that only the intended areas are colored.
Moreover, the use of aluminum foil is instrumental in separating different sections of hair, thereby facilitating a more uniform application of dye. This separation is crucial for multi-tonal dye jobs, such as balayage or ombre, where distinct color transitions are desired. By individually wrapping sections of hair, aluminum foil helps in keeping each segment isolated, preventing any unintentional color blending and allowing for cleaner, more defined results. This method ensures that the dye adheres to the targeted strands without interference from surrounding hair.
Faster Processing Time
Another significant advantage of using aluminum foil for dying hair is the reduction in processing time. The thermal properties of aluminum foil play a pivotal role in this aspect. Aluminum foil is an excellent conductor of heat, which means that it helps to retain and distribute the heat generated by the scalp or introduced through external heat sources like blow dryers. This retained heat accelerates the activation of the hair dye, thereby speeding up the process and yielding quicker results.
When comparing the dyeing process with and without aluminum foil, the difference in processing time becomes apparent. Without foil, the dye may take longer to develop, especially in a cooler environment. In contrast, the use of aluminum foil creates a warm micro-environment around the hair, fostering a faster reaction between the dye and the hair follicles. This efficiency is particularly beneficial for those with a tight schedule or for professionals managing multiple clients in a salon setting, making aluminum foil an invaluable tool in the hair dyeing toolkit.
Protection from Overlapping Colors
Using aluminum foil in the hair dyeing process also offers the critical benefit of protecting against overlapping colors. Color bleed is a common challenge when dyeing hair, where the dye from one section may seep into another, leading to undesired and unsightly blending of colors. Aluminum foil acts as a barrier, effectively containing the dye within each wrapped section. This containment ensures that the dye only affects the intended hair strands, preserving the integrity of the color design.
Maintaining clean and distinct color patterns is especially important in intricate dye jobs such as multi-tonal highlights or creative color combinations. With aluminum foil, it's easier to maintain sharp contrasts between different shades, ensuring that each color remains vibrant and true to its intended hue. By preventing unintentional color mixing, aluminum foil helps achieve a professional and polished look that might be difficult to replicate using foil-free methods. For people aiming for complex and stylish hair designs, aluminum foil is a trusted ally in achieving flawless results.
Step-by-Step Guide to Dying Hair with Aluminum Foil
Preparing for the Dyeing Process
Before you begin using aluminum foil for dying hair, it is crucial to gather all the necessary tools and materials. Proper preparation ensures a smooth dyeing experience and helps achieve precise results. Here's what you'll need:
- A roll of aluminum foil, preferably pre-cut sheets for convenience.
- Hair dye of your choice, along with developer as per the dye’s instructions.
- Hair clips for sectioning.
- A dye brush for application.
- Gloves to protect your hands from the dye.
- A comb for detangling and parting hair.
- An old towel or cloth to protect your clothes.
- A timer to track processing time.
Additionally, it’s important to prepare your hair before the dyeing process. Make sure your hair is clean and dry for better dye absorption. If you have any previous dye or product buildup, consider using a clarifying shampoo a day before dyeing. Also, choosing the right dye is essential. Consult a color chart to select a shade that complements your skin tone and consider performing a patch test 24 hours prior to ensure there are no allergic reactions.
Foiling Technique
The key to achieving salon-quality results when using aluminum foil for dying hair lies in the foiling technique. Follow these detailed instructions for precise application:
Step 1: Sectioning the Hair
Start by separating your hair into manageable sections using clips. Divide the hair based on your desired outcome – for full highlights, section the entire head; for partial highlights, focus on specific areas such as the front or top layers.
Step 2: Applying the Dye and Aluminum Foil
Take a small section of hair, about 1-2 inches wide. Place a strip of aluminum foil underneath the hair section, close to the scalp. Using the dye brush, apply the dye evenly from roots to tips. Carefully fold the foil in half, covering the dyed hair. Fold the edges inward to secure the foil in place and prevent any leakage.
Step 3: Ensuring Even Dye Distribution
For even distribution, make sure the hair is fully coated with dye before folding the foil. Repeat the process for each section, working systematically from front to back or vice versa. Keep the sections small and uniform to achieve consistent results.
Step 4: Processing Time
Once all sections are foiled and dyed, set a timer according to the dye instructions. The thermal properties of aluminum foil speed up the process, so keep a close eye on the timer to avoid over-processing.
Post-Dyeing Care
Removing the aluminum foil and caring for your newly dyed hair are crucial steps to ensure the longevity and vibrancy of the color:
Step 1: Removing the Foil
Carefully unroll and remove the foil strips one by one. Avoid pulling or tugging to prevent damage to the hair. If any foil sticks, gently rinse it out with cool water.
Step 2: Rinsing and Conditioning
Rinse your hair thoroughly with cool water to remove any excess dye. Follow with a color-safe shampoo and conditioner to seal the color and add moisture. You may also use a deep conditioning mask to repair and nourish your hair post-dyeing.
Step 3: Avoid Heat Styling
For the first few days after dyeing, avoid using heat styling tools to prevent color fading and damage. Let your hair air dry naturally when possible. If you must use heat, apply a heat protectant spray to shield your hair from thermal damage.
Step 4: Regular Maintenance
To maintain the vibrant color, use sulfate-free shampoos and conditioners designed for colored hair. Limit washing your hair to prevent rapid color fade and consider using a color-depositing conditioner to keep the hue fresh between dyeing sessions.
By following this step-by-step guide, you can achieve beautiful, professional-looking hair color using aluminum foil in the comfort of your home. The precision and control provided by aluminum foil ensure that your highlights, lowlights, or full color applications are consistently stunning and vibrant.
Pro Tips and Common Mistakes When Using Aluminum Foil for Dying Hair
Expert Tips for Best Results
Achieving salon-quality color at home is entirely possible with some professional tips and tricks. When using aluminum foil for dying hair, it's crucial to focus on technique and preparation. Below are some expert recommendations:
1. Use Quality Products: Investing in high-quality dyes and developer is essential. Professional-grade products often yield better results and are easier to work with.
2. Pre-Sectioning: Before applying dye, section your hair meticulously. Professionals often divide the hair into quadrants—front left, front right, back left, and back right. This allows for better control and precision when applying the dye.
3. Blending Techniques: For seamless transitions between colors, feather the dye towards the ends of the hair or use a comb to blend the colors at the intersection. This helps to avoid harsh lines and ensures a more natural look.
Avoiding Common Mistakes
Using aluminum foil for dying hair can lead to stunning results, but it's also accompanied by a set of common pitfalls. Here’s how to sidestep some typical errors:
1. Faulty Foiling: One common mistake is not securing the foil properly. If the foil slips, it can cause uneven color distribution. Make sure to fold the edges of the foil tightly around the hair section to prevent slipping.
2. Overlapping Sections: Overlapping hair sections inside the foil can cause uneven coloring and patches. Ensure that each section of hair is properly separated and that the foil pieces are not layered on top of each other.
3. Uneven Dye Application: Always apply dye evenly from roots to ends. Uneven application can result in an inconsistent color. Using a dye brush can help distribute the product more evenly than hands alone.
4. Timing Issues: Follow the recommended processing times on your dye’s instructions. Over-processing can lead to hair damage, while under-processing can result in less vibrant colors.
Safety Precautions
While using aluminum foil for dying hair is generally safe, following some safety guidelines can prevent damage to your hair and skin:
1. Avoid Overheating: The thermal properties of aluminum foil can lead to faster processing times but can also cause hair to overheat. Check the foil packets regularly and never use additional heat unless directed by the hair dye manufacturer.
2. Gentle Removal: When removing the foil, do so gently to avoid pulling or breaking the hair. Rinse the hair while the foil is still in place to help slide it off more easily.
3. Patch Test: Always perform a patch test before applying dye to your entire head. This helps identify any allergic reactions or sensitivities to the dye or other products used.
4. Disposable Considerations: After the dyeing process, dispose of the aluminum foil responsibly. Since it may have remnants of chemicals, place it in a waste bag rather than recycling. Always follow local disposal guidelines for aluminum and chemical waste.
By implementing these pro tips and being mindful of common mistakes, you can achieve stunning, professional-looking hair color at home using aluminum foil. Remember, practice and patience are key to mastering this technique.
Conclusion
Utilizing aluminum foil for dying hair offers several compelling advantages, from enhanced precision and control to faster processing times and protection against color bleeding. Mastering the foiling technique allows for clean, distinct color patterns that can elevate your hair dyeing results, whether at home or in a professional salon.
Following a systematic approach, starting with careful preparation and leading through detailed application instructions, ensures that you achieve the desired outcomes while maintaining hair health. Moreover, taking heed of expert tips and avoiding common pitfalls can make a significant difference in the final appearance of your dyed hair.
Remember, safety is paramount when working with hair dye and aluminum foil. Proper handling and disposal of materials not only protect your hair but also benefit the environment. With these comprehensive tips and techniques, you can confidently embrace the versatility and effectiveness of aluminum foil for your hair dyeing endeavors.