
How to Use Aluminum Foil for Hair Coloring
1. Preparing for Hair Coloring with Aluminum Foil
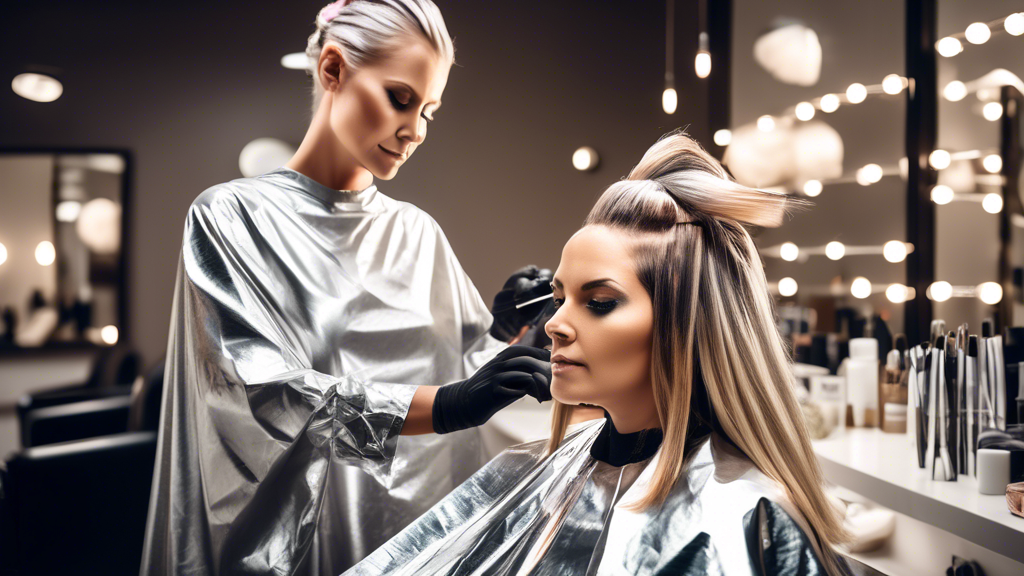
Aluminum foil for hair coloring not only helps in achieving precise highlights and lowlights but also ensures that the color is applied evenly. This technique, popular among professional and DIY hair colorists, can provide salon-quality results at home when done correctly. To get started, it’s essential to understand the basics of preparing your hair and materials.
Choosing the Right Aluminum Foil
To achieve the best results, it is crucial to select the proper type of aluminum foil. Opt for aluminum foil that is thick enough to withstand handling during the coloring process but thin enough to fold easily. Standard hairdressing foils or heavy-duty kitchen foils cut to the required size are ideal choices.
Gathering Necessary Tools and Materials
Before you begin, gather all the tools and materials you will need. This includes:
- Gloves to protect your hands from staining
- Pre-cut foil strips
- Coloring brushes
- Hair clips to section the hair
- The hair color or lightener you plan to use
Sectioning and Prepping Hair
Proper sectioning of the hair is vital for even color distribution. Divide your hair into manageable sections using hair clips. Ensure each section is small enough to handle easily but large enough to hold the desired amount of color. Prepping your hair thoroughly will help achieve an even and professional look.
Preparing for Hair Coloring with Aluminum Foil
Choosing the Right Aluminum Foil
When preparing for a hair coloring session using aluminum foil, the first step is selecting the appropriate type of foil. Not all aluminum foils are created equal, and certain characteristics make some more suitable for hair coloring than others. Here's what to consider:
Thickness: Thick aluminum foil is generally preferable as it provides better support and control during the application process. Standard household aluminum foil usually has sufficient thickness, but professional-grade foil can offer enhanced durability and easier handling.
Size: The size of aluminum foil sheets can significantly impact ease of use. Pre-cut sheets specifically designed for hair coloring are available, but if you're using a household roll, ensure to cut the foil into pieces large enough to completely enclose each section of hair. Typically, a size of 4 to 6 inches wide and 8 to 12 inches long works well for most applications.
Choosing the right aluminum foil not only facilitates a smoother coloring process but also improves the overall evenness and quality of the final result.
Gathering Necessary Tools and Materials
Having all the necessary tools and materials on hand before you start helps to ensure a seamless coloring experience without any interruptions. Here's a comprehensive list of what you’ll need:
- Gloves: Wearing gloves protects your hands from stains and irritation caused by hair dye chemicals.
- Coloring Brushes: Brushes designed for hair coloring help in the precise application of dye.
- Hair Clips: Use clips to section your hair and keep it out of the way of the areas you are not working on.
- Aluminum Foil Sheets: Pre-cut or custom-cut to the required sizes for your specific needs.
- Mixing Bowls: Separate bowls for mixing different shades or types of dye.
- Protective Cloth or Cape: Protect your clothing and skin from spills with a cape or an old towel.
Gathering these supplies will make the hair coloring process as efficient and stress-free as possible.
Sectioning and Prepping Hair
Proper sectioning and prepping of your hair is crucial for achieving even and professional-looking results. This step ensures that every strand of hair receives the same amount of dye, avoiding any uneven patches. Follow these tips to prep and section your hair effectively:
Detangle Hair: Before you start sectioning, make sure your hair is thoroughly detangled. Use a wide-tooth comb to remove knots and smooth the hair.
Dry Hair: Hair should be dry for most coloring techniques as wet hair can dilute the dye and lead to inconsistent results. Make sure your hair is fully dry before you begin.
Sectioning Hair: Use hair clips to divide your hair into manageable sections. Typically, four to eight sections work well depending on the volume and thickness of your hair. A common method is to part the hair down the middle from the forehead to the nape of the neck, then horizontally from ear to ear, creating four primary sections.
Ensure Clean Sections: When sectioning, aim for clean, straight lines to prevent overlapping sections. This ensures that the dye is applied evenly and thoroughly to each part of your hair.
These preparations are key to successfully using aluminum foil for hair coloring, providing a solid foundation for the subsequent application steps.
Step-by-Step Guide to Coloring Hair with Aluminum Foil
Mixing the Hair Color
Creating the perfect hair color mix is crucial for achieving the desired results. Start by reading the instructions on your hair dye package thoroughly. Each brand might have different mixing ratios and techniques. Generally, you'll need to mix the color cream with a developer, typically in a 1:1 or 1:2 ratio. Use a non-metallic bowl and a coloring brush to combine these products until the mixture is smooth and consistent. Ensure you're in a well-ventilated area to avoid inhaling any strong fumes.
Mix an adequate amount of color to cover all sections of your hair, but avoid over-mixing to prevent waste. Remember, different sections might require more or less product based on the thickness and length of your hair.
Applying Hair Color with Aluminum Foil
Now that your color mixture is ready, let's move on to the application process using aluminum foil. Here’s a detailed guide to help you:
- Prepare Your Foils: Cut aluminum foil into strips, approximately 4 inches wide and 12 inches long. The size can vary based on your hair length and the area you are coloring. Having them pre-cut ensures a smooth workflow.
- Section Your Hair: Use hair clips to divide your hair into manageable sections. This methodical approach ensures you get even coverage and can easily track which segments have been dyed.
- Apply the Color: Take a thin slice of hair using the tail end of your coloring brush. Hold the section taut and apply the color from the roots to the ends, ensuring complete saturation. Remember to work from the bottom layers of your hair upwards.
- Place the Foil: Once the color is applied to a section, place the prepared aluminum foil underneath the hair close to the roots. Fold the bottom of the foil up towards the scalp so that the entire colored portion is covered. Then, fold the sides in to secure the section. This folding technique helps in holding the heat, speeding up the color processing.
- Repeat the Process: Continue the same application process for the remaining sections of your hair. Always check and ensure that each section is properly saturated with the color.
- Check for Even Coverage: Once all sections are wrapped in foil, inspect them to ensure even application. If some areas look sparse or patchy, gently open the foil and apply more color as necessary.
Timing and Processing
Proper timing is vital for achieving your desired hair color while ensuring the health of your hair. Different hair types and colors require different processing times:
- Regular Coloring: Standard dye jobs typically need between 30 to 45 minutes. However, always follow the specific time suggested by your hair dye package.
- Lightening/Highlighting: If you're lightening your hair or adding highlights, the process may take longer, ranging from 45 minutes to over an hour, based on your base color and the intensity of the desired highlight.
- Textured Hair: Coarser, more textured hair might need additional time to absorb the color fully compared to finer hair types.
To avoid over-processing, perform strand tests during the coloring process. Carefully unwrap a section to check if the color has developed to your liking. If it has, you can begin the rinsing process for all sections. If not, re-wrap and give it a few more minutes.
Always keep a timer on hand to track your processing time accurately and avoid leaving the color on for too long, which could potentially damage your hair.
Post-Coloring Care and Maintenance
Rinsing and Conditioning Hair
After you have allowed the hair color to process for the recommended amount of time, the first crucial step is to rinse your hair thoroughly. Start by removing the aluminum foil carefully to avoid any breakage or tangling. Once all foils are removed, rinse your hair with lukewarm water until the water runs clear. This ensures that all excess color is washed out, preventing any staining or uneven coloring.
Next, apply a color-safe shampoo to cleanse your hair. Using a product specifically designed for colored hair will help lock in the color and add moisture, which is often lost during the coloring process. After shampooing, condition your hair using a deep conditioning treatment. This step is vital as it helps to restore the hair’s natural moisture balance and adds a protective layer, making it smooth and manageable.
Maintaining Color Longevity
Ensuring that your new hair color stays vibrant for as long as possible involves adopting a dedicated hair care routine. Begin by investing in high-quality, color-safe hair care products. Shampoos and conditioners formulated for colored hair contain ingredients that help to preserve the color and prevent it from fading quickly. Look for sulfate-free options, as sulfates can strip the hair of its natural oils and color.
Additionally, limit the frequency of hair washing to prevent the color from washing out too soon. Washing your hair two to three times a week should suffice, depending on your hair type and lifestyle. When washing, use cool or lukewarm water instead of hot water, as hot water can open up the hair cuticles, causing the color to fade faster.
Using heat styling tools such as blow dryers, curling irons, and straighteners can also impact the longevity of your color. If you must use these tools, always apply a heat protectant spray beforehand. This not only shields your hair from heat damage but also helps maintain your color’s vibrancy.
Incorporating a weekly deep conditioning or hair mask treatment can make a significant difference in the health and appearance of your colored hair. These treatments provide intense hydration, repairing any damage caused by the coloring process and helping to keep your hair looking shiny and vibrant.
Touch-Up Tips
As your hair grows, you will notice new growth at the roots, creating a contrast with your colored hair. Regular touch-ups are necessary to maintain a consistent look. Using aluminum foil for hair coloring can be highly effective for these touch-ups, especially for highlights or sections of hair that need recoloring.
Start by sectioning the hair as you did initially, focusing on the areas that require touching up. Prepare a small amount of hair color, following the same mixing instructions as your initial coloring process. Using a fine-tooth comb, isolate small sections of hair that need recoloring and apply the color from the roots to the tips, ensuring even coverage.
Place a piece of aluminum foil underneath each section, applying the hair color on the foil to maintain separation from the rest of your hair. Fold the foil neatly to secure the colored section, just as you did during the initial coloring process. Allow the color to process for the recommended time, then rinse and condition as usual.
Touching up your hair regularly not only maintains your desired look but also reduces the overall time and effort required for full coloring sessions. By following these steps and using the appropriate products, you can keep your hair looking vibrant and healthy between colorings.
Remember, the key to beautiful, long-lasting hair color lies in consistent care and maintenance. By taking the time to rinse and condition properly, using color-safe products, protecting your hair from heat, and performing regular touch-ups, you can enjoy salon-quality results from the comfort of your home. Aluminum foil for hair coloring is a versatile tool that, when used correctly, can help you achieve professional-looking results and extend the life of your hair color.
Conclusion
Using aluminum foil for hair coloring is a tried and true method that ensures professional-looking results from the comfort of your own home. With the right preparations, tools, and techniques, you can achieve beautifully colored hair that stands out. Remember to choose the appropriate type and size of aluminum foil, gather all necessary materials, and carefully section and prep your hair before you begin the coloring process.
Key Takeaways
Following the step-by-step guide ensures effective application of the hair color, while paying attention to timing and processing will help you attain your desired results. After coloring, proper rinsing, conditioning, and ongoing maintenance are essential to keep your hair healthy and vibrant. Lastly, knowing how to perform touch-ups using aluminum foil will help you keep your hair looking fresh between coloring sessions.
By incorporating these practices into your routine, you can make the most out of using aluminum foil for hair coloring and enjoy long-lasting, salon-quality results.