
The art of hair coloring continues to evolve, and one of the most innovative tools making waves in salons is the balayage board with teeth. This tool is revolutionizing the way stylists apply color, especially when creating the sun-kissed, natural look that balayage is known for. Here, we explore the benefits and techniques of using a balayage board with teeth to enhance hair coloring results.
Understanding the Balayage Technique
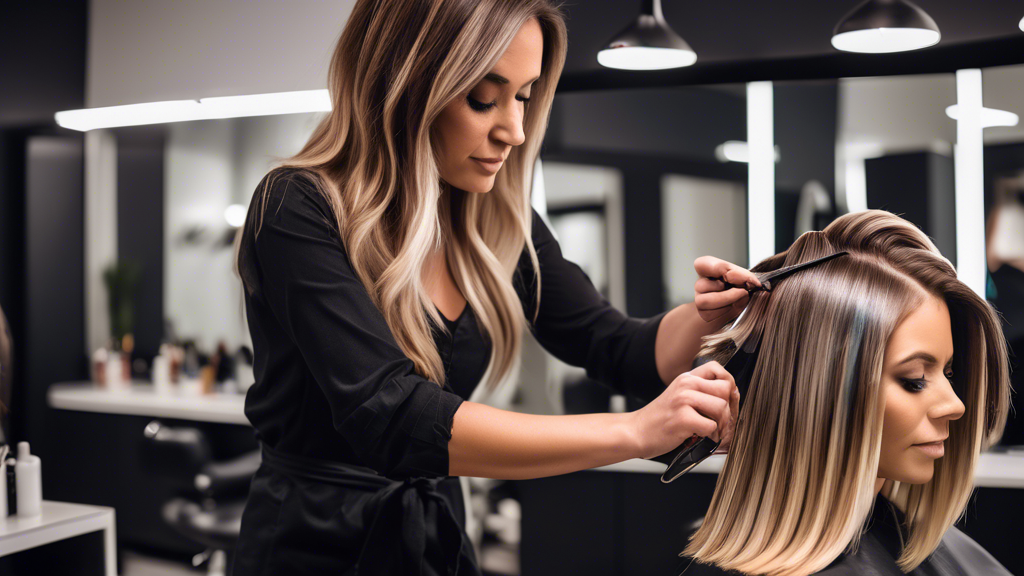
Balayage, a French word meaning to sweep, is a hair coloring technique where the color is painted onto the hair in a freehand manner. This technique allows for a more natural transition between the darker and lighter shades, mimicking the effects of sunlight on the hair. Unlike traditional foil highlights, balayage creates a softer, more blended look.
The Role of a Balayage Board with Teeth
A balayage board with teeth is a flat, paddle-like tool that features small, evenly spaced teeth along its edge. These teeth help to comb through the hair, ensuring even distribution of the color while also holding the hair in place. This unique design provides several distinct advantages:
- Enhanced Precision: The teeth on the board keep sections of hair separated and controlled, allowing the stylist to apply color more precisely and avoid any unintended blending of different strands.
- Better Saturation: The board provides a firm surface to apply pressure, ensuring the color penetrates the hair completely and uniformly.
- Increased Speed: The ability to hold hair sections securely and apply color quickly means stylists can achieve the desired results more efficiently, reducing the overall time spent on the balayage process.
- Consistency: Using the board helps maintain a consistent angle and pressure, leading to more uniform application and minimizing the risk of uneven or patchy color.
How to Use a Balayage Board with Teeth
For stylists new to this tool or those looking to refine their technique, here are some key steps to follow:
1. Section the Hair
Begin by sectioning the hair into manageable parts. This makes it easier to control the application process and ensures each section gets the right amount of attention.
2. Position the Board
Place the balayage board with teeth under a section of hair, holding it at an angle close to the scalp. The teeth should help secure the hair, making it easier to apply the color without slipping.
3. Apply the Color
Using a brush, start applying the color onto the hair. Thanks to the firm surface provided by the board, you can use gentle strokes to paint the color evenly while ensuring full saturation.
4. Blend and Feather
For a more natural look, feather the ends by lightly dragging the brush upward. This helps create a seamless transition from the natural hair color to the lighter shades.
5. Move Methodically
Repeat the process section by section, moving methodically to ensure that every part receives the same attention and care. The teeth on the board will help maintain separation between sections, preventing any color overlapping.
Conclusion
A balayage board with teeth is a game-changer for stylists looking to achieve impeccable balayage results. By enhancing precision, improving color saturation, increasing speed, and ensuring consistency, this tool elevates the hair coloring experience for both the stylist and the client. Whether you're a seasoned professional or new to the art of balayage, incorporating this innovative board into your toolkit can help you master the subtle complexities of this beautiful technique, delivering stunning, natural-looking results every time.