
Dreaming of salon-quality ombre hair but without the hefty price tag? You can achieve that stunning, gradient effect at home with a few essential tools and a bit of patience. This guide will take you through the process step-by-step, ensuring you attain a professional look from the comfort of your own bathroom.
Understanding Ombre Hair
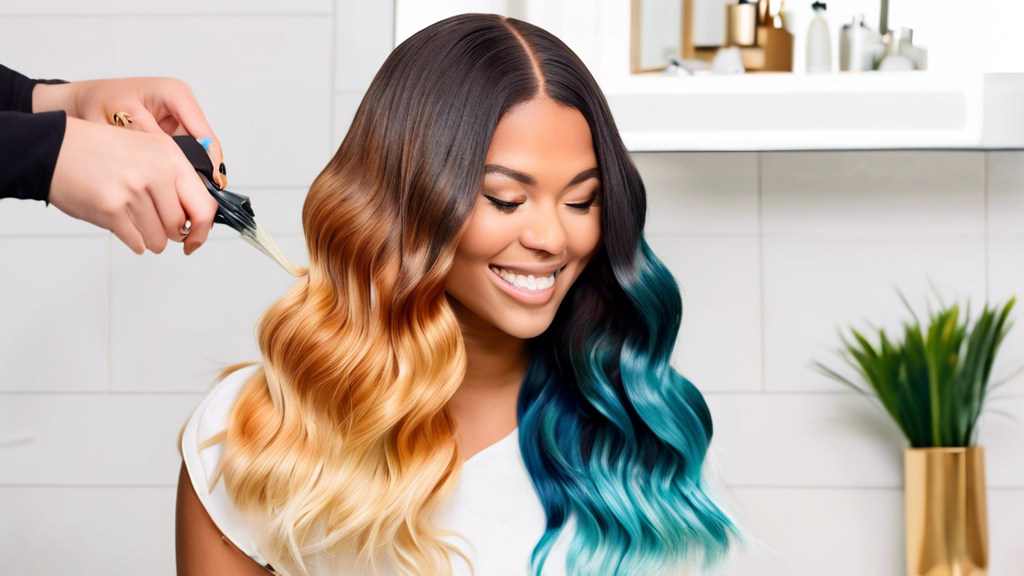
Ombre hair is a coloring technique that blends two hair shades, typically transitioning from a darker root to a lighter tip. This graduated color effect can make your hair look fuller and add a touch of sophistication to your style. The best part is, ombre hair can be tailored to suit any hair type, base color, and personal preference.
Gather Your Supplies
Before you get started, make sure you have all the necessary materials:
- Hair bleach (preferably a kit with bleach powder and developer)
- Hair dye in your desired shade
- Balayage or highlighting brush
- A comb
- Hair clips
- Plastic gloves
- Old towels or T-shirt to cover your clothing
- Deep conditioner or hair mask
Step-by-Step Process
1. Prep Your Hair
Start by washing your hair 24-48 hours before you begin the ombre process. Natural oils will protect your scalp during bleaching. Brush out any tangles to ensure smooth application.
2. Section Your Hair
Divide your hair into four sections – two at the front and two at the back. Use hair clips to secure each section. This will help you apply the bleach and dye evenly.
3. Mix the Bleach
Follow the instructions on your bleaching kit. Typically, this involves mixing bleach powder with a developer. Ensure you're wearing plastic gloves to protect your hands.
4. Apply the Bleach
Start with the back sections. Using your balayage brush, apply the bleach from the mid-length to the ends, feathering upwards to create a seamless blend. The lower you go on your hair, the lighter it will appear. Ensure you cover all strands evenly. Repeat for the front sections.
5. Process the Bleach
Leave the bleach on for 20-45 minutes, depending on how light you want your ombre to be. Check your hair every 10 minutes. Once you've achieved the desired lightness, rinse thoroughly with lukewarm water.
6. Apply the Dye
After your hair is bleached and dried, apply the hair dye. Start again from the mid-lengths to the ends, feathering upwards to blend. This step is crucial for achieving a natural gradient effect.
7. Rinse and Condition
Once the dye has processed for the recommended time on the package, rinse your hair until the water runs clear. Use a deep conditioner or hair mask to replenish the moisture lost during bleaching. Leave it on for at least 5-10 minutes before rinsing out.
Post-Color Care
Taking care of your ombre hair is essential to maintain its vibrancy and health:
- Avoid washing your hair too frequently; 2-3 times a week is ideal.
- Use sulfate-free and color-protecting shampoos and conditioners.
- Apply a leave-in conditioner or hair serum to keep your hair hydrated.
- Minimize heat styling to prevent further damage.
- Consider using a purple shampoo to maintain the cool tones of blonde ombre.
Experiment and Enjoy
One of the greatest advantages of ombre hair is its versatility. You can experiment with various shades – from natural blondes and browns to bold pinks and blues. The key is to follow the detailed steps carefully and always prioritize the health of your hair.
With practice and the right techniques, achieving stunning ombre hair at home is entirely possible. So, set aside some time, gather your supplies, and get ready to transform your look with this beautiful, timeless hair trend.